


How To: Resonate With Guitar Recording, Part 1
From acoustic to electric guitars and everything in between, this tutorial will get you comfortable recording anything in the chordophone family.
22 December 2015
Tutorial: Michael Carpenter
There’s no one way to record guitars. There are as many variations of guitar recording techniques as there are guitars. And when I say ‘guitars’, I’m not just referring to electric and acoustic guitars, but lumping in other chordophones like banjos, mandolins, resonators and ukuleles as well… which makes for a lot of techniques. The aim of this article is to get us thinking about the best ways to get the sounds we need, by focusing on our ideas and concepts first, then choosing our tools and techniques second, making the process as seamless and inspiring as possible.
Whenever you’re facing a situation with as many creative variables as guitar recording, the most important thing to do is not do anything. That’s right. Before you go plugging anything in, just stop! Spend a minute or two mapping out what you’re trying to achieve with the live take and any upcoming overdubs. Let’s take a country track as an example. Rather than just diving into the guitar tracks, stop and conceptualise them first, then make a detailed list that may read something like this:
- Double tracked acoustic guitars
- Twangy telecaster lead lines
- Long, timed, tremolo strums throughout
- Big grunty chords in the chorus; double tracked
- ‘Scene change’ Leslie guitar line in the bridge
- Guitar solo
- Imitation reverby ‘pedal steel’-type guitar throughout
- Banjo line in verses
- Mandolin in breakdown verse

By my count, that one song could involve up to 11 different instruments, a couple of capos and multiple recording approaches! It’s easy for the process to get convoluted. By laying it out, you have a clear sense of what you’d like to attempt. There’s no guarantee these overdubs will all work, but they will give you a pretty clear starting point, and certainly help you refine your vision as the overdubbing process evolves.
Top Tip: Make a guitar production plan first!
This applies to any guitar recording situation; whether you’re a solo singer/songwriter, or play an obscure form of Scandinavian metal. Even better; use sonic references to give the creative team a clearer understanding of when to use different recording techniques.
The most successful guitar sessions begin with a guitarist knowing where they want to go. I may play them a song once and they’ll say, “Telecaster for the main rhythm track with a ‘Mellencamp’ tone; Gretsch into the Vox, heavily compressed, as a secondary rhythm; the Strat into the Boogie with slight phaser for the solo; and 6- and 12-string acoustics, the latter with a capo on the 5th fret panned left and right to give that rhythmic shimmer.” Boom! They’ve basically given me a roadmap for the next two hours of work.
Listen to Keith Urban’s Kiss A Girl for an example of well-planned guitar tones that effectively build the track.

As a producer, you’ve decided you want some acoustic guitar in your track. But what sort of acoustic sound are you after? Is it a nice and close James Taylor-esque vibe, or a ‘John Lennon-in-1964’ heavy strum, or the more ambient War-era U2 acoustic guitar bashing? Behind these choices are three very different approaches but each starts with choosing the right instrument.
While electric guitars come in a variety of shapes and configurations that are easy to delineate from each other, acoustic guitars generally all have a similar configuration — body, sound hole, neck. And while a $200 acoustic may not look that dissimilar to a $50,000 acoustic, they’re often incredibly different beasts. Fortunately, as an engineer, there’s a few simple things you can get into the habit of doing to peel away the veneer and mother of pearl inlays and get at the sound.
The easiest is to just listen. If you have a general idea that your guitarist is going to gently finger-pick, get them to play something stylistically similar while they’re working parts out. Walk around in front of the guitarist — up close, pulled back a little further, near where the neck joins the body, down at the base of the instrument — and listen. If there’s a few different guitar options, get the guitarist to change them around every 20 seconds or so. I guarantee it will take you only about one minute, and in that time you’ll be able to make a decision about which guitar is the right one, where it sounds best and whether the part is working with your own ideas.
Conversely, if they’re playing a harder, heavier strumming part, step back even further and listen to how it’s exciting the room. You’ll also be able to work out quickly whether you want the sound to feel up close and tactile, or more ambient and enveloping.
The most successful guitar sessions begin with a guitarist knowing where they want to go
A trap is thinking that just because a guitar is big with a commensurately big sound, it’ll sound ‘big’ under the mics. One of the most impressively loud and expensive-sounding acoustics I’ve owned came across as overly boomy, undefined in the mid range and hollow in the top end when recorded. Conversely, I have a moderately-priced acoustic that has a more closed and confined tone, and mics love it both up close and far away. Guitarists feel comfortable playing it too, because they can play hard into it without fear of the sound ‘running away’ from them.
Top Tip: First and foremost, find an acoustic that works for the part you have planned.
RIGHT POSITION & RIGHT MIC
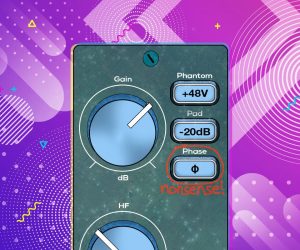
Picking the right mic for the job requires even more listening. I generally prefer large diaphragm condenser microphones on acoustics, especially for a big bold tone. But small diaphragm condensers give a different sense of focus and sometimes a cleaner top end. I’m always wary of proximity effect particularly on closer finger-picking, but even on the big strummy stuff. Too much bottom end is going to over work your compressor before it hits tape. I’ll often put my condenser mic into omni and move it much closer to the guitar, eliminating proximity effect while keeping the tonal focus of the top end. For more robust-sounding tracks, I love dynamic microphones pushed hard into a compressor. And of course, one of my favourite acoustic sounds is multiple guitarists all playing the same chords around one mic in omni, triple tracked!
Top Tip: Pick a mic with the right focus, but try an omni pattern if proximity effect is bringing the boom.

So how do you find that sweet spot for the mic? When I’m playing an acoustic guitar track, I’ll put up an appropriate mic (which can change) in a general position. But then, while tuning, practicing an idea or talking to the artist about the part, I’ll find myself moving around the mic. If my chair has wheels (which it almost always does), I’ll be changing my angle, my distance, sometimes even the whole positional relationship to the mic while listening with headphones on. Somewhere in all this shuffling around, I’ll find the sweetspot where the combination of the instrument, the mic and the air sound as close as possible to the sound I’ve conceptualised. At that point I freeze, and make a mental note of the position.
If I had to spell out a starting position, it would be with the mic at a 45-degree angle to the point where the guitar neck meets the body. But I always move around from that position. Sometimes I end up close to the guitar with a more acute angle. Other times I end up 90 degrees on axis, but back a metre! This part of the process is critical for you to dial in the right sound.
Top Tip: Swivel on a chair around the mic until you find the right spot for your guitar.
ONE MIC OR TWO, OR MORE?
I’ve always found the more ‘strummy’ the part is, the less mics you need. Conversely I almost always use more than one mic for lighter finger-picked parts. Often it will be in a classic two-mic configuration, of one near the neck and the other behind the strumming hand, pointed at the lower bout of the instrument’s body. In this case, the second mic is supporting the first, and, because the sound will have a lot more bottom end, I may use a more ‘narrow’ mic, like a dynamic or a small diaphragm condenser. Generally I’ll pan the two mics hard left and right, resulting in a moderately narrow stereo image with a little stereo movement. Listening to James Taylor’s crystal clear finger-picking style on Carolina On My Mind, it sounds like the engineer used a two mic combination to capture the clarity of his articulation without sacrificing the body of the guitar tone. The guitar seems to have just enough width to indicate the two mics were probably panned hard left and right.
Another alternative might be to use a good mic/bad mic combination. Once you’ve found your sweet spot, put your good mic there, and supplement it with something weird, like a crusty dynamic, or ribbon mic or something really obtuse like the Copperphone. I’ve even put up a mic with a busted diaphragm and combined it with the original ‘good’ tone. You’ll be surprised at how much of this ‘bad mic’ you end up using. Seconds by U2 is an example of a guitar tone that has been chosen to feel grittier and tactile. Perhaps a combination of a smaller, boxy-sounding guitar and a dynamic mic.
I regularly mix sessions that come in with two tracks of acoustic guitar. I assume they’re two takes, but it’s actually one guitar with two mics playing big strummy parts intended to ‘lift’ the choruses. Panning these tracks hard left and right usually results in a big slab of mono, right where the vocals and bass are sitting in the mix. My recording approach is to double track the strummy acoustics to lift a section, rather than expecting a stereo configuration to do that job. Conversely, if you’re looking for intimacy in your finger-picking, double-tracking may not only depersonalise the part, but also be quite time consuming; stereo miking may be more appropriate.
Top Tip: Multiple mics can give width to a detailed finger-picking part, but try double-tracking heavy strumming if you want width.


COMPRESSING THE LIFE INTO IT
Compression can be vital for turning an unamplified acoustic guitar sound into something larger than life. There’s no rules for this. Some will favour transparency, while others want to hear the gain reduction. I’m firmly in the latter group. Ensure your attack times aren’t completely killing the front of your strumming or picking, and your ratios help determine how aggressive your compressor will sound. The acoustic guitar on Steve Earle’s Transcendental Blues is being smashed with loads of gain reduction, effectively electrifying this acoustic tone.
Going even further back to John Lennon’s acoustic guitar tones on The Beatles’ records, what you’re generally hearing is a Neumann U47 into an Altec or Fairchild compressor, being hit pretty hard with a moderate attack, then adding the tape machine’s own saturation on top before hitting the master bus compressor again at mix time. These various layers of compression, in combination with a killer right-hand strumming technique, are a huge part of the sound of The Beatles’ records throughout their career.
Top Tip: Compression can make an acoustic sound larger than life, but watch those attack times if you want to hear that pick.
DRAWING THE LONGER STRING
These concepts are all applicable for the rest of the pack like High Strung/Nashville guitars (a 6-string with only the thinner strings from a 12-string pack), banjos, resonator guitars or mandolins. Listen to the instrument, place the right mic where it needs to be, and work out if it’s a single or double mic track, or a double-tracked overdub. Be wary that the sound may emanate from a different part of the instrument. For example, Resonator guitars and banjos seem to come across better with a mic closer to the bridge. Some open back banjos even sound better from the rear of the instrument. Mandolins may sound better with the mic nearer to the F hole. There’s no magic technique — just define the sound, and move around until you get close to it.


RESPONSES